Create a beacon
To create a new beacon, go to your CSVM dashboard (click Home if you are already logged in).
Click the add beacon button.
We need to populate a few fields before we can start using our new beacon. The beacon ID is a short string identifier associated with this beacon for your use. The real beacon ID is a 40 character GUID, so this gives you a chance to label it with a more friendly name
The success window lets you specify how long a successful firing of the beacon is good for. After a success, the beacon on the dashboard turns green, and over time it fades back to grey. Since our batch task should fire every 8 hours, we will set the success window to 8 hours, which means that the beacon should always be at least a little green unless our job failed to run.
Finally, we give our beacon a description. This is available in the dashboard, but it also allows us to add #hashtags. These tags let us group beacons together in multiple ways to view them in aggregate. For example, this job is a #batch job and it’s a #production job. Maybe it runs on #fooserver. So, after setting those tags we can see all beacons that have each of those tags.
Now we have a beacon in our dashboard:
But it’s never been fired. To get the URLs we need to instrument our process, we click on the beacon in the dashboard:
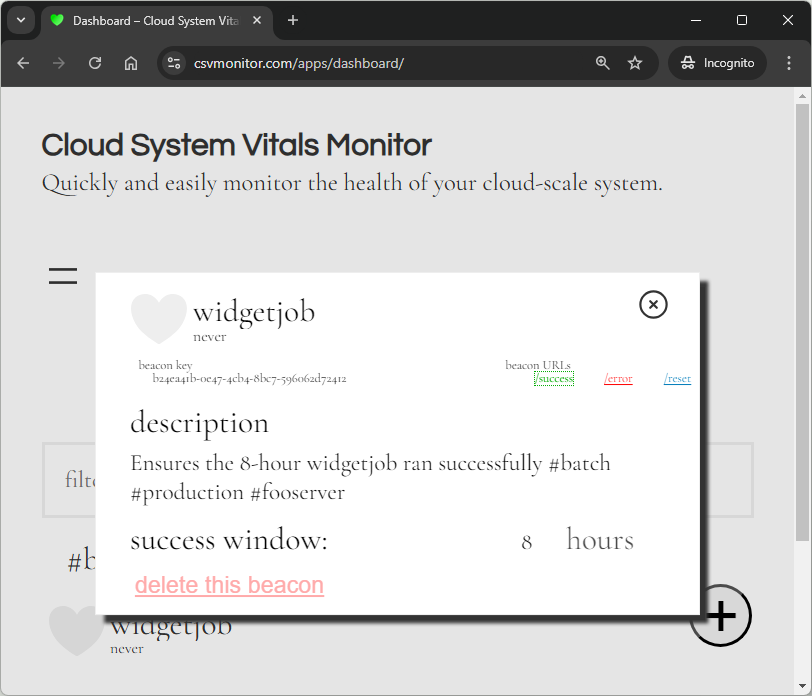
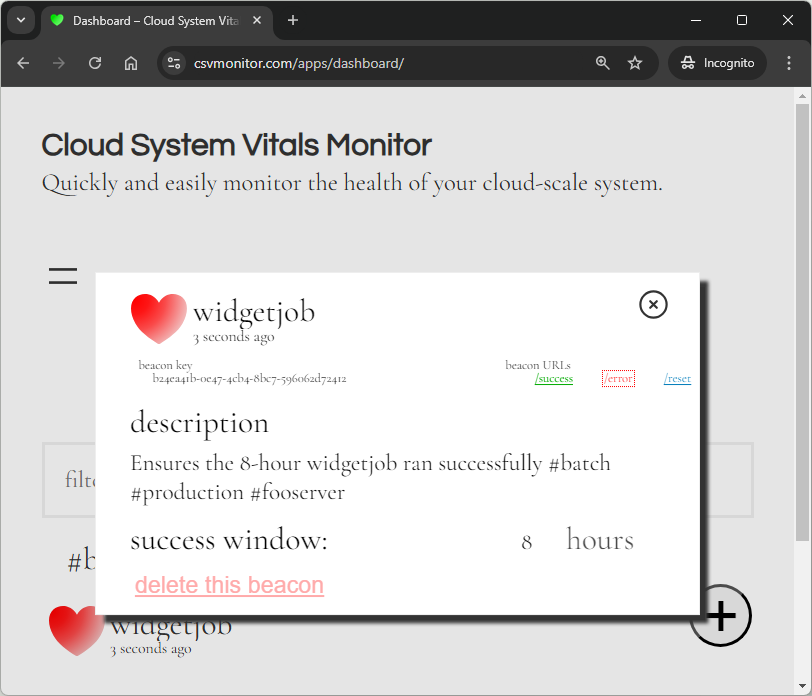
To test our new beacon, we’ll click on the /success link:

That’s it! Now the green beacon will slowly dim over the next 8 hours until it returns to grey. So once we add an HTTP request to our batch job, the beacon will be refreshed and good for another 8 hours. But what if there’s an error?
After clicking the /error link, the beacon turns red. And it will remain red until either a /success or /reset request is made.
These conventions allow us to quickly determine the status of our processes when looking at the dashboard. The beacon should always be (at least a little bit) green. If it is grey, our process isn’t running at all. If it’s red, it ran and generated an error.